Creating your first property import
The following guide assumes you have the Property Import feature enabled.
We've made creating property imports simple by taking you through a step-by-step wizard:
Step 1: Create a new import
From the 'Import Properties' screen you can get started by clicking the 'Create New Import' button in the top right corner:
Step 2: Import details
Select the CRM / Format
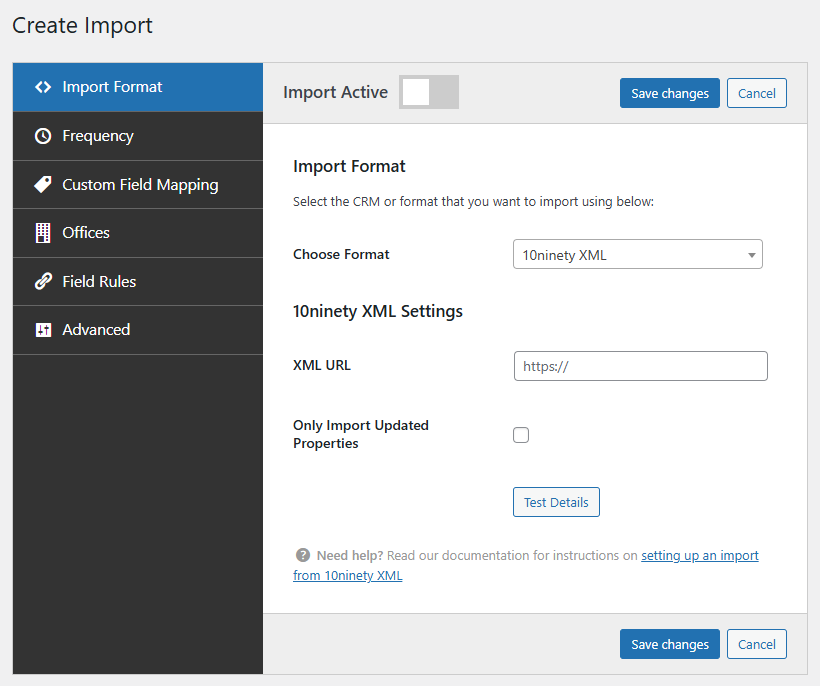
Under the 'Import Format' tab there are over 50 formats to choose from:
Note that the tabs shown on the left may differ based on the format selected.

Find the CRM you wish to import from and you'll be presented with some additional options depending on the format you've selected.
For example, choose '10ninety XML' and you'll be asked for a URL to the XML:
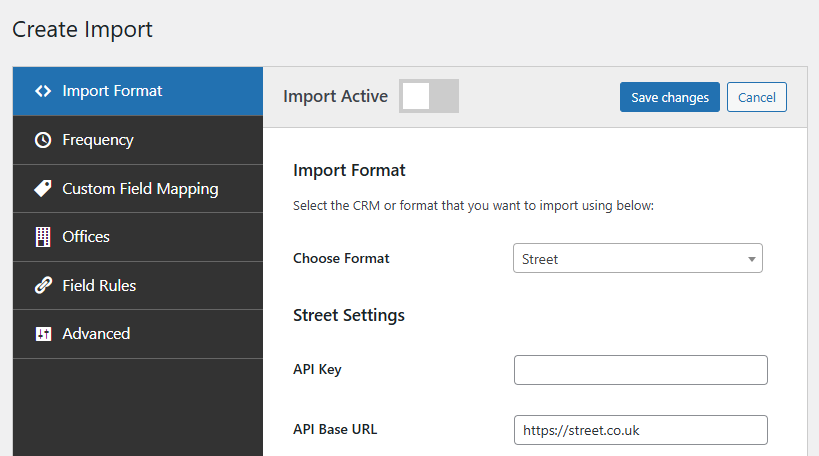
However, choose 'Street API' and you'll be asked different information:
We have guides available for each individual format outlining what information is required, where to obtain this information, and any requirements or caveats specific to that format.
Set the import frequency
Under the 'Frequency' tab you can choose how often the imports run:
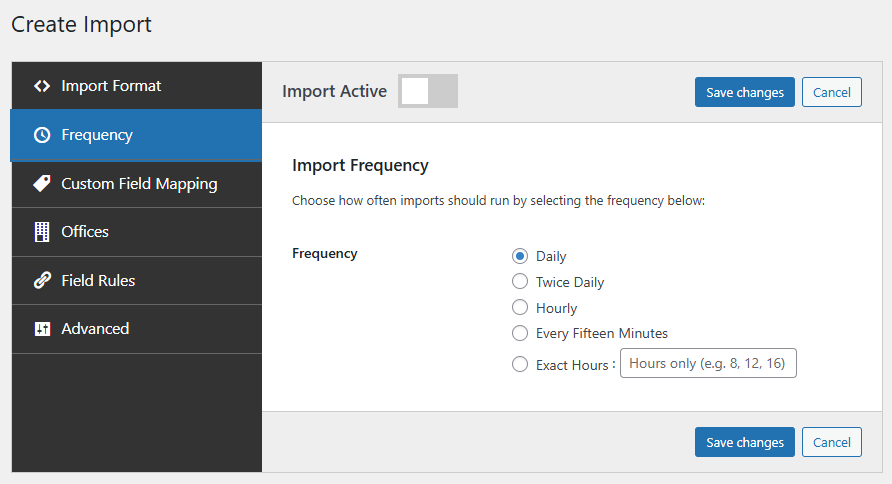
The default is 'Daily', but you can also choose also choose 'Every Fifteen Minutes', 'Hourly', 'Twice daily' or 'Exact hours' where you'll be able to specify that imports only run at certain hours throughout the day.
When entering 'Exact Hours' just enter a comma-delimited list of hours and not hours and minutes like '12:30'.
Note that imports might not execute exactly at the chosen frequency due to the way automated tasks in WordPress work. We've written more about 'Automated Tasks' here.
Configure custom field mapping
👀 This is one of the most important parts of setting up an import, and what a lot of support requests surround, so please ensure you read it thoroughly.
Under the 'Custom Field Mapping' tab you can map data belonging to custom fields sent in the feed to the custom fields you have setup in Property Hive.
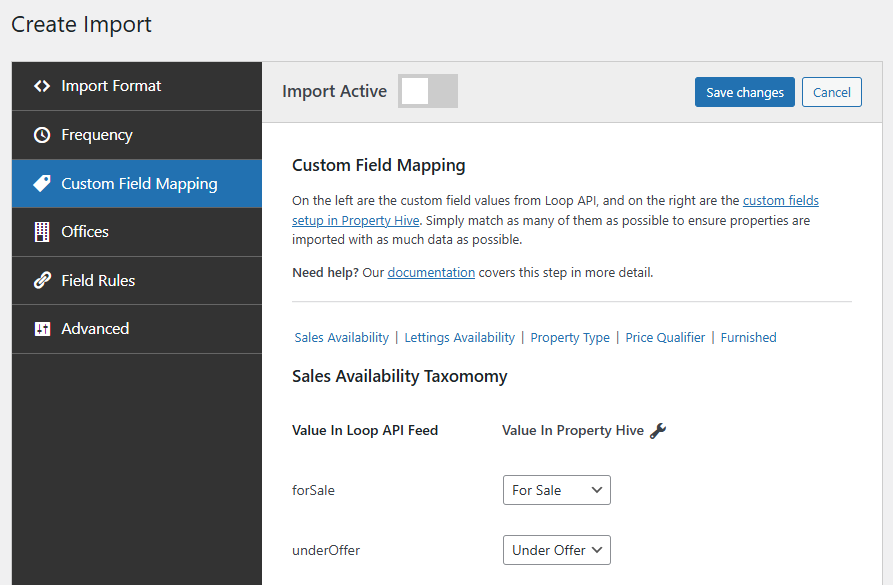
In the screenshot above we can see on the left that the first availability that can come from the CRM is 'forSale'. On the left therefore the relevant option has been chosen from the list of availabilities set up in Property Hive which is 'For Sale'.
Depending on the CRM the custom field sections will differ as will the values within each section.
When setting up an import we'll fill the custom field sections with the default and most common values we see sent by the CRMs.
In the CRM's themselves however, it's common to customise these options. For example, you might customise the property types or parking options.
As such, there's no way for Property Hive to know about these so we offer the ability to add additional mappings.
Simply click the 'Add additional mapping' link:
On the left enter the value that will come through from the CRM, and the relevant option in Property Hive on the right.
Some import formats have an option of 'Only import updated properties':
If your import does, and you have it ticked, you'll need to re-run a full feed for existing properties to inherit the updated mapping.
Map offices
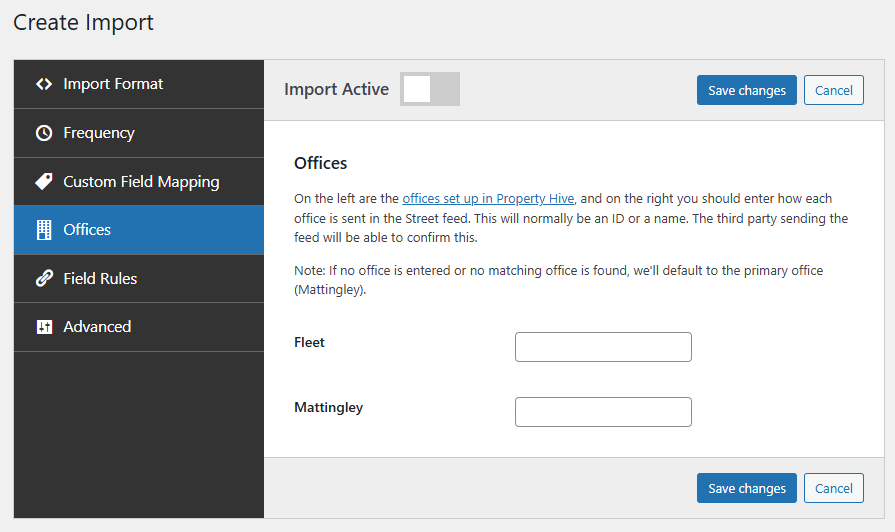
If your agency has multiple offices setup under 'Property Hive > Settings > Offices' you'll likely want to assign properties to the correct office when they're imported.
On the left are the offices setup in Property Hive.
On the right is a text field to enter how that office will be coming through in the data from the CRM. The tricky thing here is that each CRM sends office information differently.
Sometimes it'll be a simple number (1, 2, 3), sometimes it'll be a long code (2sfdf5w2sdsf) and other times it'll be the office name (Aberdeen Office).
In the CRM-specific guides we include what information is expected for this branch information and examples.
If no office can be found we'll assign properties to the 'Primary' office specified under 'Property Hive > Settings > Offices'
Specify any custom field rules
Most of the time when setting up a feed it should just be a case of choosing the format, entering the details and then sitting back and watching the import run automatically.
We know what the data schema is for each of the CRMs and what the fields are called. We know what the price field is called for example so we know what field in the data to use to import the price into Property Hive.
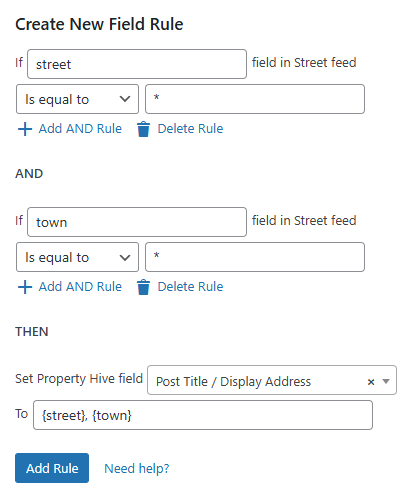
Sometimes there are anomalies however; Maybe you want to customise the structure of the display address, maybe you want to use a different field for the description, or maybe you've created an additional field and need to import data into this.
Under the 'Field Rules' tab you can create these rules that run after the data has imported to create these kinds of bespoke rules:
Advanced options
Under the 'Advanced' tab you can specify additional settings:
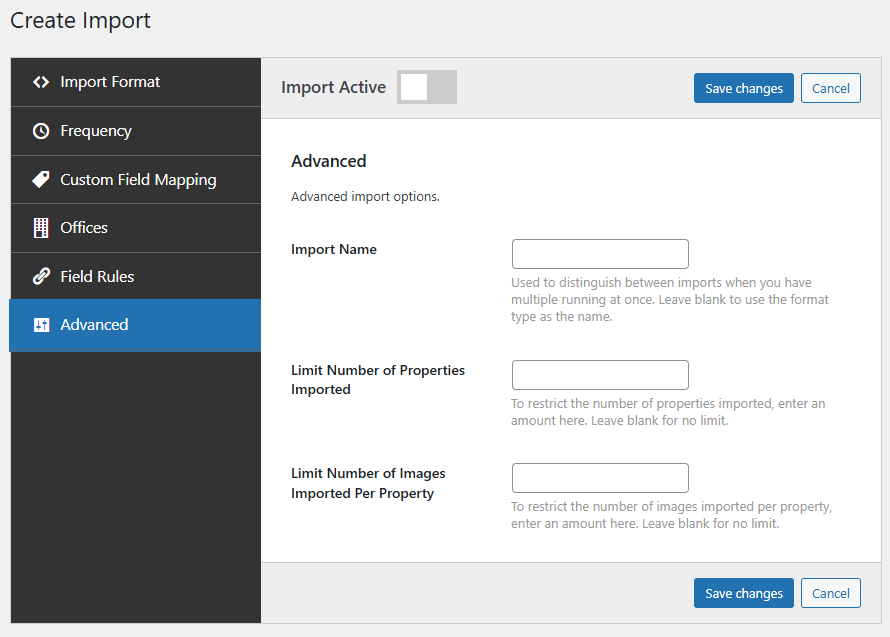
These fields are:
Import Name - Used internally to differentiate between imports. Useful if you have multiple imports from the same CRM. By naming it you can quickly see at a glance from the main imports table which import is which.
Limit Properties - Restrict the number of properties imported,
Limit Images - Restrict the number of images imported per property
That's it!
Your import is now setup and ready to run.
Be sure to start the import running if you haven't already and look in the logs to ensure it's running ok.
Please also be sure to check out our Troubleshooting guide if you encounter any issues.